السبت، 18 فبراير 2012

build your network switch


first how it is work


In order do make your own Ethernet splitters you'll need the following
Two RJ45 Crimpable Plug
Four RJ-45 keystone jack
Short Ethernet Cable Scrap (approximately 2 feet)
The tools you'll need:
RJ45 Crimp Tool
Craft knife
110 Punch Down Tool
Loctite Super Glue

Make Your Own Birthday Cards


Handmade birthday cards are unique and personal; they’re special. They say, ‘I care enough about you to make the effort.’ And, in fact, the effort doesn’t even have to be that huge but it can still result in a card that will be kept, with sweet memories, for years.

The amount of time and effort – and money - you put in, is up to you: the card can be as simple or as spectacular as your creativity allows. But bear in mind the old design adage: less is often more.

Getting the basics
If you’re just dipping your toe in the ‘make your own greetings cards’ pond, you won’t want to spend too much on initial outlay. It’s very tempting, when browsing, to go mad and buy loads of papers, gems, accessories and equipment but it’s wiser to keep it simple until you’ve had a go and decided whether or not it’s something you’ll carry on with.
One item that it is sensible to spend money on is a pack of ready-folded cards and matching envelopes. If you’ve ever tried folding card you’ll know it’s almost impossible to do it invisibly i.e. creases will be visible along the fold line. When you’ve decided you love the freedom and opportunity for creativity that card making gives you then you can buy special scoring tools and boards that enable you to make perfectly folded cards and even envelopes and boxes.

The internet provides the largest choice of craft supplies. A simple search will bring up hundreds of suppliers but to get a feel of what’s available try and find a local store to visit. Most large stationers, such as W H Smith, and some DIY superstores, stock craft materials and nowadays there are many specialist shops dedicated to home crafters as well.
The simplest cards
You don’t need to be a great artist or even have fantastic design skills to create lovely cards with a personal touch. Photos especially of babies, children or special occasions make great cards. Many home colour printers produce good quality photos or there are online services that print your digital images for as little as 5p each. Some of the online photographic companies offer a card making service so all you have to do is send them your photo, choose the layout and they’ll do the rest. Ideal if you have lots of wedding thank yous to send out, for example.
Alternatively, buy cards with an inset to allow you to include a photo or stick your photo on and create your own border.

If you have even a little drawing ability you might consider making your own cartoon cards. A quick glance in a card shop will reveal several ranges that consist of simply-drawn cartoons. The Purple Ronnie range, for example, makes great use of stick people and funny rhymes. How much more delight would a personalised and relevant cartoon and rhyme arouse?

Pressed flowers can also be used to make effective birthday cards. And children’s drawings or babies’ hand or foot prints always go down well with grannies and granddads.

The greeting
Most of us lack the sort of stylish hand-writing that is needed for the front of a greeting card but there are plenty of alternatives including:
Letter stickers – peel off the sheet and create your own message
Ready-made stamps with a birthday greeting to be used with an ink pad
Alphabet stamps – available in a wide range of fonts from simple to calligraphic, kids to woodcuts
The final touch
Choose from some of the wonderful themed papers to create a scrapbook look for your card. Layer and embellish them with appropriate symbols. Or stencil, emboss, or punch hearts. Then add the finishing touch with some extras: beads, butterflies, roses, gems, hearts. Or experiment with decoupage.
Inspiration
If you’ve got the greeting card bug and want to take it up more seriously, visit the local library. In the Arts & Crafts section you’re sure to find several books on card-making that will inspire you and give you an 'idea springboard' from which to come up with your own designs.
Most specialist gift shops stock at least one range of handmade cards. Spend some time browsing through them. See which ones you think work and which don’t and why.

The only thing that will hold back your card making is your imagination. Let it free and you’ll soon be creating wondrous greeting cards that your friends and family will love to receive. And who knows? Maybe you’ll go on to become the next big thing in the greeting card world!

Make Your Own Cushions


Making your own cushions is a fantastic way to recycle old materials for a new, functional purpose. If you need replacement cushions, or are thinking up a new interior design scheme, why not opt for making your own bespoke cushions?

Cushion making is also a great project for older children, as the craft of making cushions helps to develop a useful skills, as well as creative flair.

This article explores how to make a straightforward circular cushion. However, once you’ve mastered the simple cushion-making craft, you can also further your skills by moving to design more complicated shapes – you needn’t be restricted to the standard square of circular cushion shapes!

Getting Started
If you want to learn to make your own cushions, a simple square cushion is the easiest way to get started. But just because it's simple doesn't mean it can't be beautiful. You have design choices even with square cushions. You cushion can be enhanced with standard piping, ruched trim, appliqué designs, even tassels and fringing.
Foam for the inside of your cushion is usually available in a range of pre-measured sizes. If you need a size that isn't available, you can find a store that sells foam by the yard and buy the size you need. Don't stray too far from your original measurements, but get something just a bit larger than you need. This will account for the foam's compression once it's covered.
Choosing Fabric
To make your own circular cushion cover, you can save money and valuable resources by choosing recycled fabric. Recycled material for your cushion can consist of small scraps of leftover fabric quilted together, or vintage material sourced from charity shops or thrift stores.
The type of fabric you choose will depend on how you intend to use your cushions. For instance, if you plan to use your cushions as outdoor or patio furniture cushions, they may need to be covered with waterproof or other weather-resistant material. However, covers made for indoor seat cushions can be made using more delicate fabrics.

Consider questions about the cushion use such as: is it functional? Will it get lots of abuse? Does it need to be washable? Or is it purely decorative? Will it be used in your living room or on the garden furniture? Are you making chair cushions, sofa cushions or scatter cushions?

How you answer each of these questions will lead you toward certain fabric choices. Regardless of how you plan to use it, you should stick to upholstery fabric that is machine washable, or at least dry cleanable.

Cushion Making Instructions
Here are the steps to make your own cushions:
1.To make the cover, begin by measuring the foam pad. Add an inch to each measurement. This will give you a half-inch allowance on all sides.
2.Cut two pieces of fabric to these measurements. This will give you two identical square pieces of fabric.
3.Pin the two pieces of fabric together, making sure that the finished side of both pieces is facing in. In other words, you are assembling the cover "inside out."
4.Sew around three edges and all four corners, but leave one edge open.
5.Now, turn the fabric "right side out" and insert the foam.
6.Turn under the edges of the opening to match the other edges and slipstitch (a slipstitch is a concealed stitch used for sewing folded edges).
7.Now you can add embellishments like piping or fringe if you wish. Other options include adding a zipper or leaving an opening so you can remove the cushion cover for cleaning.
Once you master this simple type of cushion, you can branch out into other designs and techniques. When you are able to make your own cushions, your decorating will never again be limited to the available stock at your local home store or department.

Make Your Own Wildlife Habitats


Making your own wildlife habitat may seem like a novel or pleasant afternoon activity, but for the wildlife that it will benefit, it could mean the difference between life and death!

It appears that almost every week there is a story in the news about how our native wildlife is in grave danger. Several factors have been attributed to the demise of our wildlife, from a decline in natural habitats such as meadows and wetlands, thanks to urban developments, to droughts and flooding, the widespread use of harmful pesticides and invasions by damaging native food-providing wildfowers and other beneficial flora and fauna.

So it is important that those that can, do their bit to help wildlife to survive and thrive. You may not realise just how easy it is to provide food and shelter for all manner of wildlife, from tiny insects to larger mammals. By making your own wildlife habitat, you can not only save money on the commercially-produced (and often over expensive) goods, but also be repaid ten fold by the inhabitants who will be more than happy to take up residence in your garden.

The Simple Wildlife Habitat
Although, for the larger mammals it definitely helps, you needn't be well acquainted with a saw and hammer to make a perfect wildlife habitat. There are plenty of animals that will make the most of the right plant materials, nesting sites and overwintering conditions if given even half the chance. Here are a few things that you can do to provide simple yet suitable wildlife habitats in your garden:
Leaf Piles
Don't be in a hurry to keep your garden unnaturally tidy. There are loads of different insets and animals that will benefit if you leave your leaves raked into a pile in a secluded and sheltered spot of the garden. Not only is leafmould beneficial for the soil, but a pile of dry leaves is particularly attractive for a garden favourite - the Hedgehog. Hedgehogs will take the leaves and other organic matter, and use them to build up their nests. They sleep in their nests during the day, females raise their young in the nest, and the nest is where they will go into long periods of hibernation throughout the winter months.
If a hedgehog can't build a suitable nest to keep it warm and dry, then the chances are that it will use up too much energy over the winter months keeping warm, and run out of fat reserves - basically starving to death, as there will be next to no natural food sources around. A leaf pile will also be home to many small slugs and insects, which are a vital food source for hedgehogs and other omnivorous mammals. It is amazing how beneficial a simple leaf pile can be!

Wood Piles
Wood piles are also a great wildlife habitat for many small mammals and insects. Stag beetles in particular will be more than willing to make a wood pile their home, as they feed off the decomposing wood. You might be surprised at how artistic and interesting a wood pile can look, and how easily it can be incorporated into a woodland or wildlife garden. Larger wood piles can also become home to the Hedgehog, particularly if stacked in a sheltered area, such as against a garden fence, wall or behind a shed.

Compost Heap
Your humble compost heap will be teaming with life. You should always be careful of turning compost - never stick a fork directly in the pile, as you could disturb of even impale and kill small mammals. Instead, move small portions of the pile. To prevent your compost becoming home to rodents, you should avoid putting things such as meat, bones and cooked kitchen scraps onto the heap.

Make Your Own Wildlife Pond
A wildlife pond is basically a pond that can pretty much sustain itself throughout the year. A wildlife pond will become home and a watering hole to amphibians, water-loving insects, mammals and birds. You may be surprised at just how quickly your wildlife pond is put to use! During the hot summer months it may prove to be a lifesaver for many animals, so should be looked after properly.
The basics for a wildlife pond are that you need very shallow shelves at the edges, so that small animals can come to drink without falling in. A pond with steep sides is a death trap for many animals - if they fall in they cannot climb out. At its deepest point, the pond should be around 18inches - a perfect depth for hibernating pond-dwellers. Providing small stones and rocks, or broken crocks in the water will be beneficial for the pond residents that prefer to shelter underwater.

A wildlife pond will also need a mixture of marginal plants and oxidising aquatic plants. Garden centres and aquariums often stock beneficial pond plants, and will be more than willing to help you choose the right plants for your large or small wildlife pond. Why not try to stick to native aquatic plants? The pond wildlife may be more suited to living with these plants.

The edge of the pond will almost definitely become home to amphibians such as frogs, toads and newts. Frogs and toads in particular will be great at keeping your resident slug population in check, so should be welcomed with open arms!

You can provide habitats for these creatures in the simplest of ways - for instance, an old broken piece of terracotta pot or drain pipe can be partially sunk into the ground to make a small cave-like dwelling, keeping them sheltered from the wind and cold. A collection of small stones and larger rocks can be built up to provide sheltering nooks and crannies.

Even if you can make just one of these simple wildlife habitats, you'll be making a huge difference to the residents of your backyard. A wildlife garden will reduce the need for using harmful pest control, and will be able to look after itself in a balanced way. And you get the added benefit of seeing it all flourish and thrive before you!

Make Your Own Water Butt


In the UK, sometimes there's no telling whether our water butts are going to be brimming over or stone dry during the summer. The weather is becoming unpredictable, which is why it is always best to be prepared! Those that live in the South East and East Anglia will be well acquainted with the hosepipe ban. For this reason, a real need for water conservation is another motivation for making your own water butt.

By making your own water butt, you will benefit in a number of ways. Firstly, you can site several water butts around your garden or allotment, so that you don't have to trek to and from one water source. Secondly, rainwater is free, so if you have a lot of watering to do, you want have to rely on your drinking water supply - extremely handy if you're on a water meter!

Thirdly, some plants really benefit from rainwater, as it is slightly acidic (and unfortunately, due to pollution, is becoming more acidic). Plants that love ericaceous soil - such as rhododendrons, camellias and blueberries - will benefit from the acidic quality of rainwater. The fourth benefit of making your own water butt is that you can help the environment and spare your bank account by using recycled materials. So what are you waiting for?

Make Your Own Water Butt
The best material to make a water butt with is plastic. Not exactly attractive, but recycling the plastic will ensure that it goes to good use and doesn't end up in landfill. Plastic is also the best way to keep rain water in. Although wood lined with a pond liner or polythene is a good temporary option, if the wood is not strong enough it will eventually collapse under the sustained pressure of the rainwater it holds. There is also the chance that the lining plastic will become punctured - which would result in a miserable failure of a water butt!
There are different plastic containers that you can recycle into durable water butts. Old food storage bins are one option, as they also come with plastic sealed lids. Rather than leaving an open butt, a drainpipe-sized hole can be cut into the lid, making it a bit more child and pet friendly. You can spot these sorts of bins as they are usually blue in colour, and are often available on Internet auction websites. They tend to have a capacity of between 70 (around 15 gallons) and 200 litres (45 gallons).

There are two ways to access the water with these large plastic containers. You can either leave the lid off or install a tap. Leaving the lid off will give you quicker access to the water, but it may also encourage mosquitoes to breed. If your water butt runs low, it will also be difficult to access the water at the bottom of the container.

Installing a tap may time a little more time and effort, but will make the water butt much more adaptable - you won't have to rely on the container being nearly full. Water butt tap kits can easily be found in garden centres around the country. You can seal the taps in with special aquatic sealant, but be sure that your sealant doesn't contain any fungicides, as these will contaminate the water.

You should make sure that these sorts of recycled containers are steam cleaned before use. This removes any residue that might cause fungal growths. You may be tempted to source the same type of barrel that has contained chemicals. It is best to avoid these, as removing all trace of any potentially harmful chemicals may be next to impossible.

Other Options
Another option is to source old oil drums, although these may be quite expensive and difficult to find. They are, however, a perfect capacity for water butts, as they can store a more than reasonable amount of rainwater.
Recycled oak barrels are also a perfect alternative to a commercially made water butt, and will look highly attractive too. They can be sourced from dedicated suppliers, or directly from wineries. Like the plastic food containers, you will need to thoroughly clean your barrel before use. You will also need to install a wooden spigot rather than a normal water butt tap, and again seal with aquatic sealant that does not contain fungicide.

Whatever option you go for, you'll be doing yourself and the environment a favour! The more water butts you can site, the easier your life will be. Some of the options listed here may not always be the most aesthetically pleasing, however vibrantly-coloured water butts can be concealed behind a few well-sited plants, or partitioned off behind a hedge, trellis, live bamboo or an attractive latticed willow screen.

Make Your Own Bird Feeders


Making your own bird feeders for year-round use can be a lifeline for many birds. Most people think of feeding birds during the harsher winter months. However, food shortages can occur all through the year. During springtime, late frosts and wet weather can spell disaster particularly for insect eating birds. During summer, droughts or flooding can be equally as devastating.

For this reason, making the right type of food available at different times of the year is important. For instance, a homemade fat or suet feeder is not suitable for the warmer winter months, as they may be subject to fungal growths. Likewise, whole peanuts and other large seeds could prove fatal if taken back to the nest for chicks during periods of food shortage.

So whilst making your own bird feeders is admirable, make sure that you are putting the right sort of food out at the right time of year. You can find more information regarding this and bird feeder hygiene on the RSPB website.

Fat Feeders for Winter Months
During the later autumn, winter and cooler beginnings of spring, many birds will take full advantage of hanging or ground fat feeders. Fat is a vital source of energy that will help to keep birds warm in the sub-zero temperatures, helping to see them through the long winter nights.
There are two different ways to make fat feeders for birds. The first is in the form of a Fat Cake. This is literally a wedge of fat mixed in with other energy-rich foods like seed and berries, which can be hung up or put on ground feeders.
To make a Fat Cake you'll need the following:

Wild Bird Seed Mix (not salted peanuts)
Vegetable Suet or Lard
Empty Yoghurt Pots or Small Plastic Containers
Mixing Bowl
The amount of suet and birdseed you need depends entirely on how many Fat Cakes you intend to make. However, the basic ration is that for every measure of suet that you use, you'll need two measures of wild birdseed.

To start you'll need to cut the suet into small chunks and mix in with the dry birdseed in the mixing bowl. Once the mixtures are evenly combined, transfer the suet and seed into a saucepan. You'll need a gentle heat to melt down the suet until it is absorbed and the mixture is sticking together.

Whilst the fat is melting, you can prepare your containers. You'll need to make a small hole in the bottom of the pots, through which you can thread some garden twine. Knot the twine at the end and leave enough twine to tie to the tree branch or feeder stand.

Once the fat has been thoroughly melted, you can then transfer the mixture into your pots and containers. Leave the mixture to set in the fridge overnight, after which you can cut the pot and remove the fat cake. It can then be hung outside ready for the birds.

Pine Cone Fat Feeder
An alternative to the Fat Cake is the Pine Cone Feeder. As you may expect, you'll need to collect a few pine cones - the larger the better.
To make a pine cone fat feeder you can simply attach a pine cone to a piece of string and dip into melted suet or fat, before rolling in wild birdseed. Alternatively, using a blunt or palette knife, you could apply a coating of peanut butter to the pine cone, again before rolling in wild birdseed. The pine cones can then be hung out or placed on the ground for ground feeding birds.

An alternative to the pine cone fat feeder is a small branch or log with holes drilled in and filled with suet and seed mix.

Recycled Bird Feeder
You can make your own recycled bird feeder using just a simple used plastic squash or soft drinks bottle, or a used plastic milk carton. Make sure that you thoroughly wash and dry the bottle before use.
Then, leaving the bottle lid on, cut a small hole around half way down the bottle. The hole should be just about big enough so that the birds can access the seeds, and the seed itself can flow down, but not so large that the seed dribbles out at the slightest breeze!

You should also add in a few small holes at the bottom of the bottle, to aid drainage in case any rainwater finds it's way into the feeder. A few small holes at the top of the feeder will also encourage ventilation, helping to reduce moisture that may encourage fungal growths.

Then using garden wire, you can make a small hook and fix to the bottle screw cap. The recycled bird feeder can then be hung out on a branch. Make sure that you replace the feeder with a new bottle if it starts to go green or appears mouldy at all.

Make Your Own Furniture Polish


Wood is one of the most desirable materials for making furniture, and for good reason. With a multitude of colours, grains and uses, it can be used to achieve different looks to suit almost any taste. Whether you’re a fan of natural, rustic oak pieces, or prefer French-polished dark exotic woods, one thing for sure is that you’ll want to keep your wood furniture looking great and in good condition so it lasts for years to come.

One way of doing this is to routinely apply furniture polish. This can be done with either ‘finished’ or ‘unfinished’ wood. There are many commercial furniture polishes available, but you can easily make your own. Some branded furniture polishes can leave an overpowering smell, and despite claiming to include ‘natural’ ingredients such as orange oil furniture polish, they are still essentially your standard furniture polish wrapped up and marketed to be more appealing. Making your own homemade furniture polishes is, therefore, still a desirable alternative.

However, there are times when commercial polishes may be your best option. French furniture polish is made using shellac and alcohol, and creates a very high gloss finish. French furniture polish can come as part of a French polishing kit, and requires some more specialist treatment and handling compared to other polishing methods. Therefore in this case, it is perhaps best to go with the shop-bought products, as producing your own French polish could be laborious, difficult and even dangerous if not done correctly!
This article looks at a few different ways to make your own furniture polishes for finished and unfinished woods.

The Simplest Way For Finished Wood
The simplest way to make your own furniture polish is to use olive oil and lemon juice. Simply mix 2 parts of olive oil or mineral oil to 1 part of lemon juice, and rub onto your wood using a lint-free cloth. The lemon juice cuts through grease and grime, and the olive oil ‘conditions’ and polishes the wood. Once you have thoroughly applied the mixture, you can then buff with a dry, soft, lint-free cloth. This is ideal for finished woods, but shouldn’t be used on laminates. It also needs to be used on the same day, as it is not suitable for storing.
Beeswax Furniture Polish
Another simple recipe is to make your own beeswax furniture polish. All you need is to substitute olive oil in the above recipe for beeswax – so 2 parts of beeswax to 1 part of lemon juice. Alternatively, you could use the following recipe to create a creamy beeswax furniture polish:
55g (2oz) beeswax
280ml (1/2 pint) turpentine
7g (1/4oz) fragrance or essential oil of your choice

You’ll basically need to very gently heat the turpentine and wax in a metal saucepan, taking care not to allow it to simmer or boil. Mix the ingredients together as the wax dissolves. Bear in mind that turpentine is a flammable material, and so the necessary precautions should be made beforehand. If you like the smells of polishes like orange oil furniture polish, then at this stage you can add in a drop of fragrance oil once the mixture starts to cool. You can then transfer the mixture into a jar or container with a lid. Leave to cool.

This cream polish can then be applied to the wood with a lint-free cloth, before being buffed. The initial smell of turpentine will diminish quickly after application.

These recipes are easily made at home, but you should always make sure to take sensible precautions when heating and transferring hot liquids. Always take care to remove animals or children from your work area.

Make Your Own Fruit Cage


Growing your own soft fruit is a great way to enjoy fresh, succulent fruit for a fraction of the price of the supermarket equivalent. Homegrown fruit can picked and enjoyed straight from the plant, or is easily frozen and used at a later date in homemade pies, desserts, cakes and bakes.

Growing your own fruit also helps you to obtain more control over what you eat, as implementing organic methods on a domestic scale is a fairly easy process. Pest control is easier to manage, reducing the need for pesticides that can leave a residue on the fruit that is eaten.

However, one of the main challenges facing those who choose is grow fruit at home is protecting the crop from the beady eyes of wild birds and squirrels. A few seemingly harmless looking birds can almost decimate a much-anticipated fruit crop in a matter of minutes.

Luckily there are ways to protect your fruit from hungry beaks and mouths, the most common solution being the construction of a fruit cage. Although fruit cage kits are available, you can also easily make your own. Below we summarise how to make a simple permanent fruit cage for cane fruits such as raspberries to help you enjoy a heavy yield of fruit throughout summer and autumn.

Getting Started with a Simple Design
The first thing you need to consider is the height of the fruit cage. Raspberries grow pretty tall, and to pick from the bushes you’ll need to be able to stand up. With that in mind, ideally your fruit cage should be around 2 metres, or 6 and a half feet tall. Remember that you’ll need a door to your fruit cage, so find the most appropriate and accessible place for this. The length and width of the cage obviously depends on your bushes – be careful to give the new canes enough room to grow without poking through the cage netting.
The cage will need to be constructed with firm posts in all four corners. If opting for wooden posts, make sure that they’re pressure treated and coated in preservative to prolong their ‘life’. Other options include recycled scaffolding poles or aluminium tubes and copper piping. If your cage exceeds 6ft in length, you’ll have to make sure that you have an upright pole placed at 6ft intervals.

Set the poles or posts firmly into the ground, using a spirit level to ensure that all posts are at equal height and set perfectly vertically. You can then install an extra post around three or four foot from your chosen corner post. This creates the frame for your fruit cage door. Using additional poles or rough sawn timber, you can create your crossbeams, making sure to firmly fix in place with galvanised metal brackets.

Making the Door
The door to your fruit cage can be made from a very simple frame constructed with more rough sawn timber. To strengthen the actual door, you will need to cut and fix horizontal lengths of rough sawn timber at intervals down the door to create ‘sections’. You should only need three or four of these to create a sturdy door, further reinforced with a diagonal strut on the top and bottom sections. Before fixing the door to the frame, you can staple chicken wire across the frame, laid over with a fine mesh for extra protection. Then attach the door to the doorframe with hinges, using a hook and eye to secure the door in place once fixed to the frame.
Fruit Cage Mesh
It’s at this point that you can then start to fix your chosen netting and wire to the cage structure. Chicken wire is ideal, and an extra layer of fine mesh will add protection from smaller fruit-loving mammals. Make sure that you choose responsibly – some mesh can trap small and determined birds, which may result in a few rescue attempts!
The roof of your fruit cage can be fixed permanently in the same way as the sides. However, if you live in an area that experiences regular heavy rainfall or snowfall, you should consider the benefits of having a detachable fruit cage roof. This is because a build up of heavy snowfall in particular, can stretch and damage a fruit cage roof. The ideal situation is to have an interchangeable mesh for the roof, one finer for good weather and one larger span for extreme weather conditions and during pollination.

Make your own homemade Facial scrub recipe

This is an excellent facial scrub suitable for all skin types

To make 1 preparation

2 Almonds
1 teaspoon Lemon juice
1 teaspoon of honey
Grind the ingredients together and apply to your face as a scrub.

To make enough for 1 treatment

6 tablespoons cornmeal
2 tablespoons honey
1 tablespoon ground almonds or walnuts
Combine the ingredients in a small bowl, adding a little water if the mixture is too dry to apply easily. To use simply pack the scrub onto your face and leave for at least 5 minutes. Remove with warm water and a flannel.

How to Make A Garden Wildlife Pond


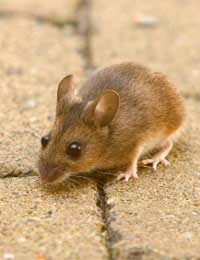
If you’re keen to encourage more wildlife into your garden, then making your own wildlife pond is a surefire way to do so. A wildlife pond performs a number of tasks – firstly, a well-managed wildlife pond will become a thriving habitat for all kinds of creatures. Amphibians, aquatic animals and insects alike will find food and shelter within the microcosm of the pond.

Secondly, a wildlife pond can become a haven for wild birds and mammals. At times it may prove a lifesaver, as it may be the only source of water in times of drought and during high summer.

Thirdly, a wildlife pond will prove a popular breeding ground for many different amphibians and insects. You’ll be surprised at how quickly your wild residents will take the opportunity to move in and make the most of your pond!

So if you’re keen to get started, this article will guide you through the rudimentary tasks and decisions you’ll need to make when creating your wildlife pond.

Considerations
Obviously, before you start you’ll need to make a few considerations. One of the biggest and most crucial decisions you’ll need to make is where to site your wildlife pond. It is such an important consideration because the site will, by and large, determine how successful the pond is.
So when choosing the location of your pond, try to opt for a spot or a corner of your garden that’s quiet and will remain undisturbed. This allows the resident and visiting wildlife to feel safe and secure. Also try to site the pond away from any deciduous trees, as their shedding leaves in autumn can prove to be a menace.

Your wildlife pond will need a bare minimum of 4 hours of sunlight a day. Having the pond in a spot that is constantly sunny can lead to an overabundance of oxygen-gobbling algae. Similarly, a pond that is mostly in shade will be cold and uninviting, and is less likely to thrive.
Another consideration is whether you want the pond to have moving water from a water feature. If this is the case, then you may need to install an electric pump that needs to be hooked up to your main power supply. But bear in mind that there are a number of solar-powered water pumps currently available. It’s also worth noting that frogs in particular much prefer still, undisturbed water.

The final consideration you need to make regards young children – if you have young children that are likely to play near the pond, make sure that you take the necessary step to secure the site with fence. Only allow your children near the pond when supervised.

Digging Your Pond
The shape and depth of your pond is also important. A pond will sheer sides will prove a death trap for many animals, particularly small animals such as hedgehogs that can swim, but have no way of crawling out of the water once they’re in it. This is why it’s so important to have a pond with a number of shallow shelves. These shelves not only protect the wildlife from drowning, but also allow small mammals and birds safe access to drink, wade and bathe in the water. A shelf around an inch deep is ideal, followed by one or two deeper shelves around 12 inches deep.
Your wildlife pond should be at least 18-24 inches at the deepest point. However, the deeper you can make the pond, the better as this aids hibernation and shelter for many pond-dwellers.

Once you’ve dug out your wildlife pond, you’ll need to line it with around an inch of sand or carpet to help avoid punctures in the pond liner. Remove any turf from the surrounding area of the pond. You can then line the pond, making sure to have enough excess at the sides to assist the growth of marginal plants. Secure the pond liner in place with heavy stones or logs, and before filling with water, line the bottom with a few rocks or broken crocks. These will act as shelters and hidey-holes for your pond residents.

As you begin filling your pond with water, you may find that you need to readjust the stones and logs as the pond liner stretches into place.

Once your pond is filled with water, allow a few days for the water to settle before planting. You can line the edges with stones to create a beached area, as well as putting down logs and upturned broken pots or terracotta drainpipes as sheltered habitats.

Planting Your Pond
One very important point is that you should never put fish into your wildlife pond, as they will eat much of the wildlife that comes to shelter and live there!
Your wildlife pond will basically need three types of plants – marginals (for planting around the boggy edges), oxygenating plants (to help the pond regulate itself and keep clean) and aquatic plants (to provide food, shade and shelter for pond life).

When choosing your plants, think carefully about what’s suited to your climate. It is also really important that if you’re planting marginals and aquatic plants, you should only use special aquatic soil. Always try to opt for native species of pond plants, as these are most likely to provide native wildlife with everything they need.

Taller marginals will provide shelter and breeding grounds for certain types of insects, whereas frogs and other amphibians may prefer low-growing foliage on your pond shelves. Always take your time to research and choose your aquatic plants, as your choices will ultimately dictate how successful your pond becomes. Get the balance right and your wildlife pond will require very little management and interference.

Make Your Own Brass and Copper Cleaner


If your cooking tools include copper and brass pans, then you need to know the ins and outs of cleaning and caring for these utensils. Copper has been used in cookware for years because of its many excellent qualities. However, it requires cleaning from time to time to maintain its appearance and performance. A little extra daily care can extend the time between special cleanings. When your copper and brass cookware do need maintenance, you can make your own cleaning solution at home.

Why Copper is Great for Cookware
Copper is an excellent conductor of heat and is easy to bend and shape. These two qualities make copper an excellent material for cookware. However, copper tarnishes easily, and when exposed to moist air, it can form poisonous substances. That's why your cookware is lined with tin, the tin protects your food from coming into contact with these substances. Brass is an alloy of copper and zinc. Adding the zinc makes the copper harder but remains easy to shape and mould. In terms of care and cleaning, brass can be treated similarly to copper.
When it is exposed to air, copper darkens in colour, or tarnishes. This is a normal chemical reaction, and tarnishing does not affect copper's heat conduction performance. However, many people find the tarnish look unsightly and prefer to maintain the original shiny appearance. If you want to keep your copper shiny, then get used to cleaning it every day, copper is very sensitive to air. Brass will keep its appearance a little longer before darkening.
Good Daily Care Leads to Longer Life
You can protect your copper and brass cookware by treating it well on a daily basis. When cooking, use utensils that are designed for non-stick cookware. This will help you avoid scratching your pans. Stick with low to medium heat; high heat can discolour the finish. Never put this type of cookware into a dishwasher.
Most dishwashing soaps are too harsh for the finish and you may end up with damage or stains you can't remove. Wash these pans by hand with hot, soapy water. Avoid steel wool or abrasive cleaners. It's also a good idea to avoid air drying, which could cause unsightly spots. Towel dry your cookware after washing. Be careful when handling and storing your pans as copper and brass are relatively soft and can dent easily. A little extra daily care will greatly increase the useful life of your cookware.

Although your grocer's shelves display many products claiming to clean copper and brass, you can actually create a very effective cleaning solution using basic ingredients you probably already have around the house. To make 2 pints (a little over 1 litre) of cleaner, gather the following ingredients:

2 oz/60g plain flour
4 oz/115g salt
8 tablespoons washing powder
6 fl oz/175ml white vinegar
2 fl oz/60 ml lemon juice
4 fl oz/115ml warm water
Mix the flour, salt and washing powder together in a large glass bowl. Add the vinegar, lemon juice and warm water, then stir. Pour the mixture into a jar that you can close tightly. Label it clearly and store it out of reach of children.

How to Use Your Homemade Cleaner
Here's how to use your homemade copper and brass cleaner. Shake the jar vigorously, the pour a little of the cleaner onto your pan. Rub gently with a cloth. For stubborn spots or stains, scrub with an old toothbrush. Then rinse with clean water, dry the pan and polish the finish with a soft cloth.
So there you have it. Copper is an excellent metal for cookware, and it's even stronger when combined with zinc to make brass. However, these metals will need a little extra care to keep them looking their best. When they do need cleaning, you can make an excellent cleaning solution at home. This makes it possible to have beautiful cookware that doesn't destroy your budget.

Make Your Own Humane Mouse Repellent


Opinions on mice can be divided; to some they're small, furry, cute animals, to others they're simply small, furry vermin. Whatever your opinion on mice, one thing most people are united on is how unhealthy it is to share your home with lots of them.

The House Mouse
In the UK, there are many different species of mouse, but the most common house-dwelling mice are the house mouse and the long-tailed field mouse. The house mouse in particular prefers warmer, indoor environments, and will try to nest under floorboards, in cavity walls and close to hot pipework or a food supply. Mice are most active at night, during which time they will scavenge for food around the house.
But the problem with mice lies in the fact that they can harbour and transmit many germs and diseases. Mice are not 'tidy' and litter-trained per se; they will leave droppings and urinate anywhere and everywhere they go, as well as shedding their fur. This means that they generally contaminate the environments they live in, and can be responsible for spreading salmonellosis (a type of food poisoning) as well as gastro-enteritis. They also play host to a range of parasites, including ticks, fleas, tapeworm and mites.
Mice can also cause lots of aesthetic and structural damage in houses, gnawing at wood, plastic, cabelling and fabrics. Therefore it's not surprising that there are many products on the market geared towards eradicating mice from the domestic home.

Repelling a Mouse
But what if you're keen to stop mice from sharing your humble abode, and you don't want to resort to poisons, mouse traps or other methods of extermination?
Humane mousetraps that allow you to catch and release mice away from the home are one option. In conjunction with this, you can help to stop mice by keeping your property in good condition - fill gaps and cracks in brickwork, walls and floors that can act as 'open doors' to mice. Also make sure that you maintain high levels of hygiene and not leave food uncovered in the house or garden. Mice have a particularly strong sense of smell and will gravitate towards leftovers, crumbs, spillages, open food containers and food left out in the open.

Herbal Remedies
There are, however, other measures you can take to humanely discourage mice from settling in your home. Some of the most common herbal remedies have been used for generations, including the use of herbs and spices. Two popular natural mouse repellents still in use today are mint and cloves. Whilst the oil of these two plants are perfectly pleasant for humans, to mice, quite simply, they're not.
If you have a small mouse problem and you think you can identify where they're entering your house, you can create mouse repellent soft balls, using a peppermint and clove oil spray. And the good news is that the spray won't stain or smell too overpowering to the human nose.

Simply mix around 100ml of peppermint oil and with 50ml of clove oil, before adding to around 100ml of water. Shake thoroughly to combine and decant into a spray bottle, which can be bought cheaply from garden centres and home stores. You'll then need to thoroughly soak a cotton wool ball in the herbal solution and place in the suspect areas where you think mice might be nesting or accessing your home

Ten 'Make Your Own' Uses for Lemons


Lemons are cheap, natural and, above all, useful! Here are a number of innovative ways to make the most of the humble lemon.

Lighten Your Hair
If you already have blonde or light hair, lemon is a great natural highlighter which will help accentuate your hair’s natural beauty. It won’t significantly lighten darker hair.
To lighten your hair with lemon juice, choose a sunny day! Rub some fresh lemon juice into your hair evenly, taking care to reach the roots and the hairline. Leave the juice in your hair for around an hour while you sit in the sun, then rinse. Leaving it much longer than this can dry your hair out.

You can repeat this process once a week for a limited period to get the desired effect but be careful that the acid does not dry out your hair.

Good Health
Lemon juice has many reported health properties and many people swear by it to ward off or soothe colds or sore throats. Try drinking a lemon squeezed into hot water every morning to keep bugs at bay. If you’re suffering from a cold or sore throat, drink it in hot water with some honey.
Cleaning
Lemons are a great natural cleaner. Baking soda used with lemon juice will clean and brighten a variety of surfaces such as chopping boards, sinks, draining boards, taps and work tops.
De-greasing
Lemon juice also makes a great cleaner and shiner for glass and windows. Add half a lemon to a bucket of water and buff off with newspaper.
Adding a good squeeze of lemon juice to washing up water, as well as washing-up liquid, can help to cut through grease.
Freshen Up
Lemons will also add a lovely citrus-fresh scent to places that tend to get stinky, such as microwaves and fridges. To freshen a fridge just place lemon halves in the fridge or soak a sponge in lemon juice.
To refresh the smell of your microwave, squeeze half a lemon into a cup of water and microwave for around three minutes.

Putting a lemon in your dishwasher will also neutralise any unpleasant odours.

Clean Hands
If you’ve been cooking with pungent ingredients such as garlic or fish, you’ll know they can often make your hands smell for a while afterwards. Try rubbing lemon juice on them to neutralise the odour.
Super Salads
Squeezing lemon juice over fruit, veg and salad will keep them looking fresh. It will prevent foods such as apples, avocado, cauliflower and potato from becoming discoloured while cooking or standing.
Ice and a Slice
Add slices of lemon to ice cube trays and top with water before freezing. They make great two-in-one refreshers to add to cold drinks.
Exfoliate and Smooth
Lemon can be used in a number of beautifying processes and one is to exfoliate the skin, leaving it smooth and free of dry skin. Mix pulped lemon with brown sugar and gently scrub dry areas such as feet, heels, elbows and knees with it.
Keep Ants Out
Lemon juice is commonly said to repel ants. Try squeezing it around areas which are prone to ant problems.

Make Your Own Electricity1


Making your own energy can be more environmentally friendly and sustainable than buying from energy companies. It can also be cheaper. You can create energy from renewable sources such as the sun, wind and water. Creating energy for your own home is known as “micro-generation”.

Renewable energy creates low or no carbon when it’s generated, unlike fossil fuels. As well as often being cheaper to create yourself, you can also sell excess energy back to the national grid. Despite these money-saving possibilities, it’s also important to bear in mind that home renewable energy systems can be quite expensive to set up but more than pay for themselves over time.

The type of micro-generation that suits you will depend on a number of factors such as your energy needs, your home and the weather. For example, you’ll need to live somewhere sufficiently windy for a wind turbine to generate enough energy. Similarly, you will need to have enough surface area facing south for solar panels to be possible. In some cases a combination of technologies can be the best solution.

Make Your Own Electricity 2

Solar Power
Energy can be generated from the sun using photovoltaic systems or solar panels. Panels can be added to roofs or buildings as long as an area faces 90 degrees south. If there is too much shade or the light is blocked by trees, not enough energy will be generated.
To buy and install a system which generates up to half a domestic property’s electricity requirements will cost around £12,500.

Wind Energy
Wind turbines use turning blades to generate electricity. Domestic wind power systems are particularly well suited to houses situated in remote areas. This is an added bonus because traditional electricity supplies can often be harder to access in these areas.
Wind turbines are best mounted on a mast or tower where wind speeds are faster. There should be no major obstructions that will break the wind, such as trees or large buildings. To check whether your property is suitable for wind energy generation, it’s usually advisable to do a long-term test on wind speeds (up to one year).

A wind energy system to suit an average house is likely to cost around £15,000.
Water Power
Energy can be harnessed from water when it is used to power a turbine. Power can be generated even from a small stream but the water source will need to be fairly close to where you live. The amount of energy that you can harness from water will be affected by how fast the water is flowing and how far it falls. You may need planning permission to install a turbine.
It is estimated that a typical domestic system will cost around £20,000 to £25,000.

More Ways to Generate Your Own Electricity
Other ways to generate electricity include:
Ground source heat pumps – This uses a ground loop, harnessing heat from the earth.
Bio-energy – Energy can be created by using organic matter (biomass) such as woodchips.
Micro CHP – Micro CHP generates electricity from fossil or renewable fuels using a furnace. It harnesses the heat that is normally wasted when electricity is generated.

الجمعة، 17 فبراير 2012

Make your own homemade Funnel


If you find yourself looking for a funnel to pour liquid into a container. A quick solution is to cut the top off a plastic soft drinks bottle and turn it upside down. You will have a ready made funnel. Simple yet clever

Make your own homemade Flower preserver

You can make your own Flower preserver that will dry your flowers to look good for years. Below you will find 2 methods for preserving flowers:

Method 1

1 cup borax
2 cups of cornmeal
To dry your flowers, place one or two in an airtight container with a layer of borax and cornmeal mixed together in the bottom. Leave the container in a cool, dry place. After 7 to 10 days, remove the flowers and dust them with a soft artist's brush.

Method 2

Preserve fresh flowers by placing them on a bed of clean cat litter in an airtight container for 7 to 10 days.

Make your own homemade Duster (Household)

Here is an economical way of turning old rags and scraps of material into a duster that polishes as well as dusts.

To make 1 duster

2 floz/60ml vinegar
2 floz/60ml paraffin
12 in/300mm square piece of cloth
Mix the vinegar and paraffin together in a glass or plastic bowl and add the cloth square. Leave for 1 hour for the cloth to thoroughly soak up the mixture. Then wring out the cloth and hang it up to dry before using; store in a dry place.

Make your own homemade Windshield cleaner

Remove dirt, general mess and even dried insects with this effective spray.

To make 12 oz/340g

8 tablespoons powdered chalk
4 tablespoons baking soda
16 tablespoons Fuller’s earth
Enough water to make a paste
Combine the ingredients in a small pan or other container and stir slowly until a paste is formed. Apply the mixture directly to the dirty windshield with a sponge, and then polish with a dry cloth .

Make your own homemade After bath splash

Here is a recipe to make a refreshing citrus- scented lotion, that you can use as an after bath splash

To Make 5floz/150ml

4oz/115ml rubbing alcohol
3 teaspoons lemon essence
Juice of 1 lime
In a small bowl, combine the alcohol, lemon essence and lime juice. Shake well and then transfer to a covered jar and store in the refrigerator. If you suffer with dry skin, use a moisturiser after using this splash.

baby wipes

Here is a recipe to make your own baby wipes:

1- roll of good-quality ALL WHITE paper towels, cut in half. (I use Bounty, because they're sturdy and I can buy them in bulk.)
2 cups warm water
2 tablespoons baby shampoo
1 tablespoon baby oil
1 teaspoon rubbing alcohol, (optional)

Mix water, shampoo, oil, and alcohol in a sutable container. Add 1/2 roll of paper towels, cut side down. (Save other half for next time.) Put on lid and let soak until all liquid is absorbed. (About 5- 10 mins.) Turn container upside-down and leave it for about 30 mins, to make sure liquid is completely absorbed. Turn it back over, wait a few minutes, and they're ready to use!

I like these wipes better than store-bought because they're cheaper, bigger, last longer, and they're made of stuff that you already have on hand if you have a baby.

air freshener

Do you have a strong smell in your home that you would like to hide? Well here is a recipe for a spicy fragrance that will overpower most strong smells.

To make 8fl oz/225ml

4 tablespoons dried sage
8 tablespoons crumbled bay leaves
8fl oz/225ml witch hazel
Mix all the ingredients together in a jar. Cover and leave to sit in a dark place (but not the fridge) for 3 days. Strain out the herbs and pour the remaining liquid into a spray bottle . use an necessary

Make your own homemade Air freshener with vinegar

To make a safe homemade air freshener you need the following:

one-tablespoon vinegar
one-teaspoon baking soda
two cups of water
Mix the above together, after is stops foaming, mix well, and using a spray bottle, spray it into the air.

home madebook binding glue

to make 1/3of acup of your own book binding glue you will need the following :.

1 pack or1/4 oz unflavored gelatin
3 tbs boiling water
1 tbs vinegar
1 tsp glycerin
Bring the water to the boil in a pan, add the gelatin and stir until the gelatin is completely dissolved. Add the vinegar and glycerin while stirring until mixture is well blended.

To Use While the glue is still warm, apply a thin layer with a brush to the area you want to bind. This glue is waterproof and is great for binding leather to leather. It also makes good flexible glue for use on paper or for gluing cloth to cardboard.

To Store Store in a tightly capped plastic or glass jar and it will keep for several months. If the glue gels in the bottle, you may warm it in hot water and you will be able to reuse it

الثلاثاء، 24 يناير 2012

build your network switch

first                                                          how it is work

 In order do make your own Ethernet splitters you'll need the following
Two RJ45 Crimpable Plug
Four RJ-45 keystone jack
Short Ethernet Cable Scrap (approximately 2 feet)
The tools you'll need:
RJ45 Crimp Tool
Craft knife
110 Punch Down Tool
Loctite Super Glue
Crimp the RJ45 Plug to the ethernet cable
...using the following wiring scheme
1 White/Orange 
2 Orange 
3 White/Green 
4 Blue 
5 White/Blue 
6 Green 
7 White/Brown 
8 Brown 
Taken from the excellent Hardware Book: www.hardwarebook.net/cable/network/ethernet10basetstraightthru.html
now 3Punch down the other end to the RJ-45 keystone jacks
Take the other end of the cable, cut it to 9 inches and punch down the four pairs using the following wiring scheme: 
Jack #1:
1 White/Orange to pin 1keystone jack
2 Orange to pin 2 keystone jack
3 White/Green to pin 3 keystone jack
6 Green to pin 6 keystone jack
Jack #2:
4 Blue to pin 2 keystone jack
5 White/Blue to pin 1 keystone jack
7 White/Brown to pin 3 keystone jack
8 Brown to pin 6 keystone jack
Once all the pairs are punched down, you can glue together side by side the two keystone jacks.
Make one more splitter
using the previous information so you end up having two splitters.
Plug one splitter to the RJ45 wallplate
... and plug the two computers to the splitter.
Plug the other splitter to the patch panel
...and plug two patch cords from the splitter to two free ethernet jacks from the switch. If your splitter connections are right the two leds "LINK" from the switch on which the patch cord are connected should turn on.

We now have two computers simultaneously connected using only one ethernet cable. This method is similar to PoE (Power over Ethernet) but instead of injecting DC, it is injecting another "data". 
But again, it is better if you can to pull one more ethernet cable from the patch panel to the wallplate. But in some specific cases, the Ethernet "splitter" can help out.